Boards back in, and a test fit of the platform and semaphores. Looking good.
I’ve actually bought some point rodding kits for this part of the layout. Not all of it, just the six points outside the small shunting yard. But that’s enough!!!

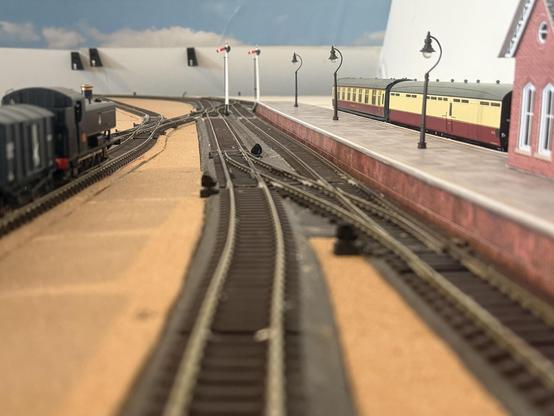
Boards back in, and a test fit of the platform and semaphores. Looking good.
I’ve actually bought some point rodding kits for this part of the layout. Not all of it, just the six points outside the small shunting yard. But that’s enough!!!
A compact OO gauge layout built around the #Hornby R8011 TrakMat, designed for flexible running, easy expansion. The plan features 74 pieces of track - 53 ft (16 m) overall track length - on 6 × 4 ft (2 × 1.5 m).

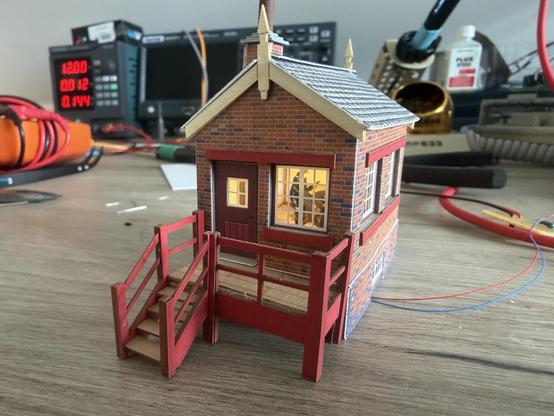
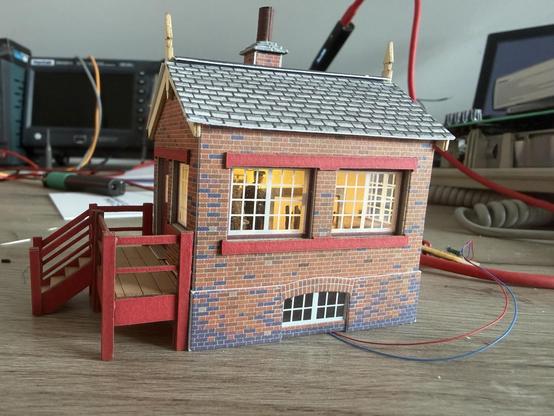
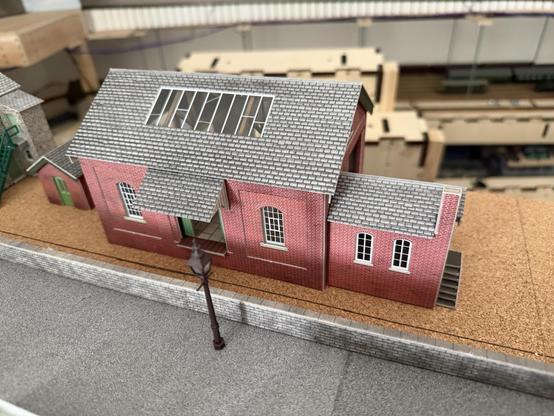
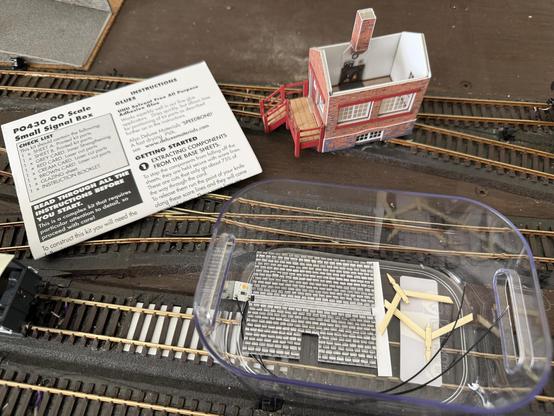
Completed signal box with signalman, lever frame, furniture, and overhead light. Most of what’s in there is barely visible, but a lit empty room with big windows like these stands out a mile.
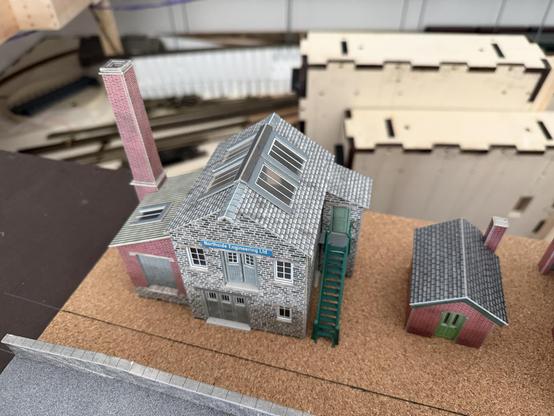
The full complement of ten buildings are now ready for the branch line boards. Next up, semaphore signal electronics and 3D printed mounts, and then to build the station platform up from the 3D prints I’ve got ready.
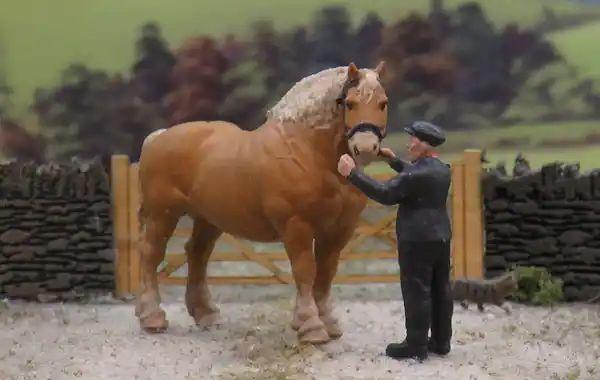
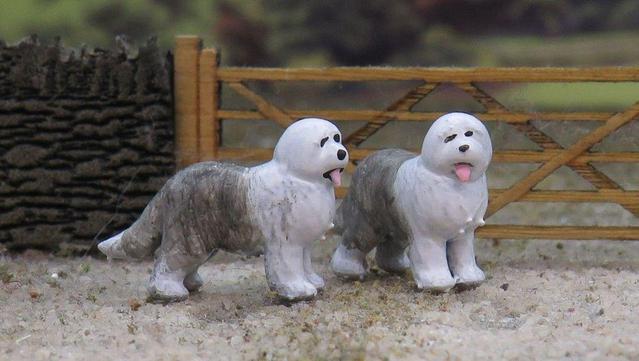
Osborns Models has released new ready-painted OO/HO figures for model railways — a Suffolk Punch horse and handler, a pair of Old English Sheepdogs, and more:
https://world-of-railways.co.uk/news/osborns-m
odels-releases-new-figures-2026-04
…
#HOScale #OOScale #modelrailway #hoscaletrains #modeltrain #diorama
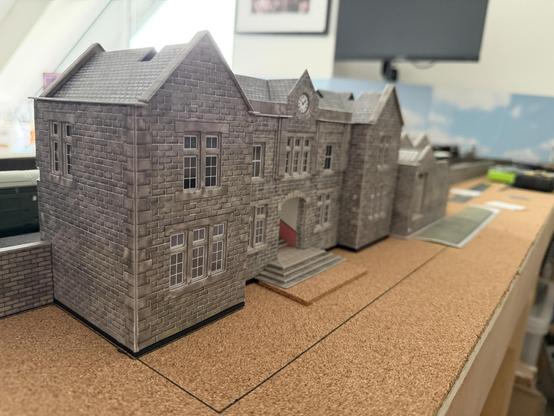
The last week’s evenings have been busy. All these buildings are for the branch line station and goods yard.
Model railway update:
About half of the aspect signals I plan to use are now installed, wired up and partially programmed (it’s an iterative process as I learn how the signal control boards work).
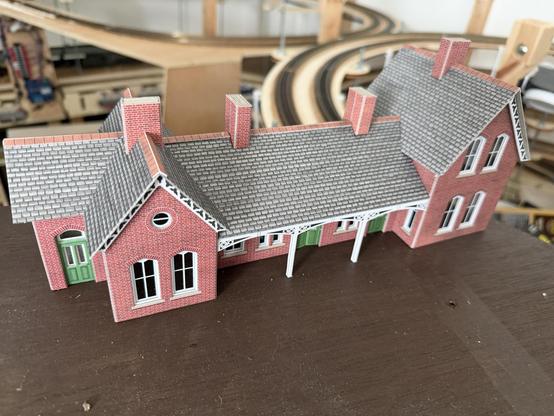
Two of the three platform structures in the main station are all but finished. I have some pavement strips to apply to platform 1 and I need to paint and install the tops of the chimneys on the two buildings. Then I can start work on the structures for platform 4.
The buildings aren’t perfect but the things I’m not happy with are pretty small and probably not noticeable by most people 😬
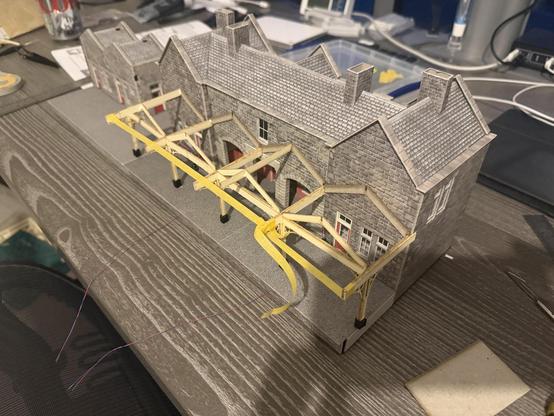
Island platform waiting room and canopies are under construction…
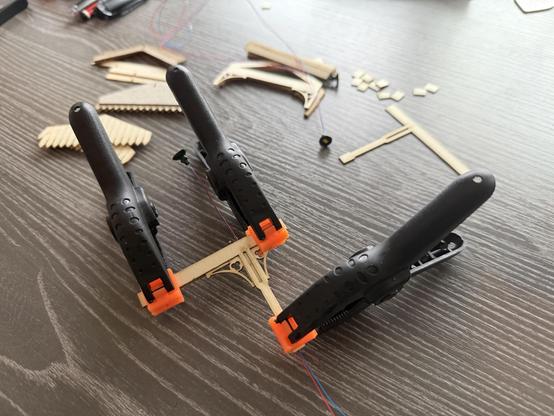
Time to get the fiddly canopies into the station buildings. And they are fiddly. Lot of measuring.
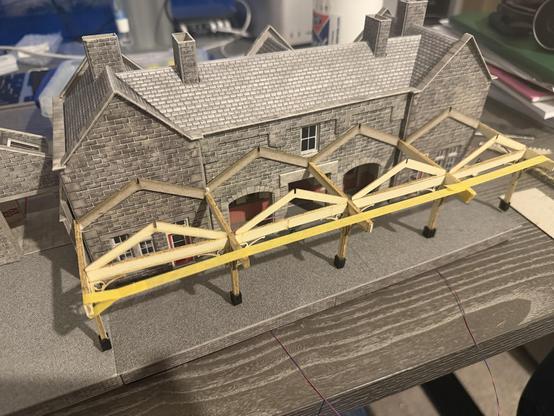
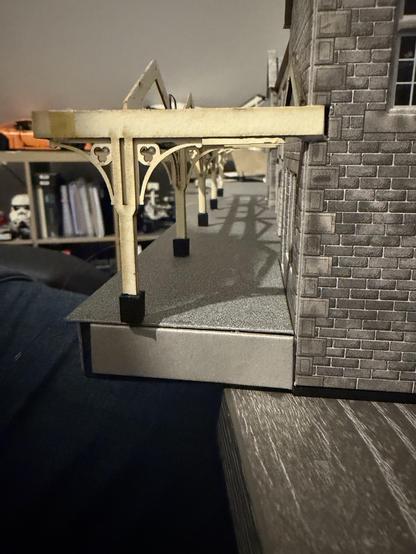
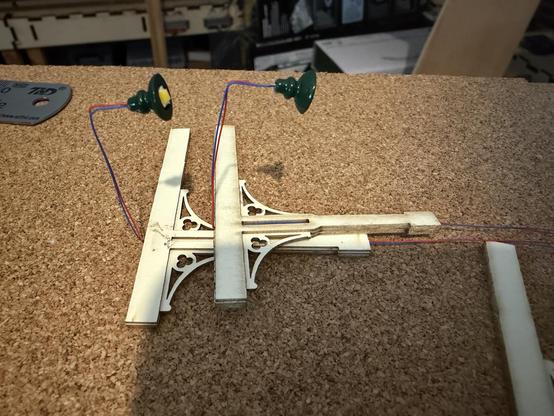
This lunchtime I’ve spent some time working on incorporating hanging lights into the Metcalfe platform canopies. It’s going quite well so far. Taken my time to work out exactly how to get the lamps where I want.
Platform 1 and the associated buildings contribute to make slow but steady progress…