BeOS 3.0 demonstration apps showcase

We have just demonstrated the installation of BeOS 3.0 under an 86Box virtual machine, alongside Windows 95. As a reminder, BeOS 3.0 was first surfaced for Intel x86 processors after being exclusive to BeBox during the Developer Release and Preview Release versions.

After the installation of BeOS 3.0 was successful, we can now finally show you all demonstration apps that were provided with this version of BeOS, though we’ll give you quick overviews about what those demonstration apps represent.

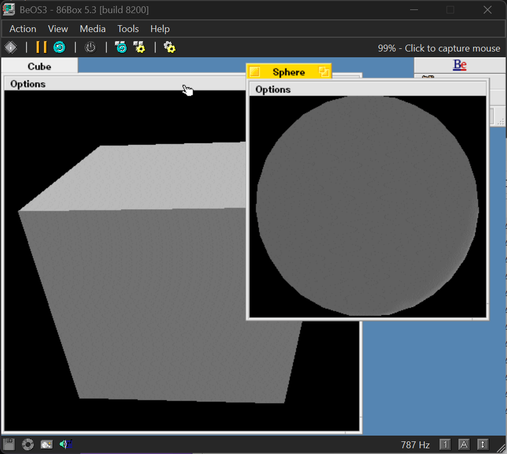
3dmov

This demo application shows you a rotating cube. You can manipulate with 3D objects in real time, with support for dragging TIFF images and movies to those interactive objects. There are four objects for you to choose: Cube, Sphere, Pulse, and Book.

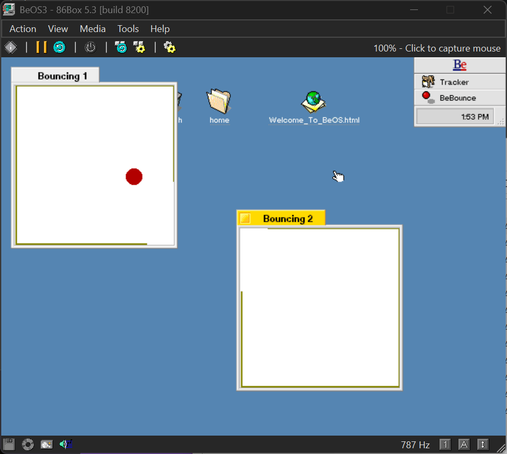
BeBounce

This shows you a bouncing ball through a window, but it also demonstrates how two applications communicate with each other. It achieves this kind of communication by opening a “pathway” for the ball to move from window to window.

BeLogo

It shows you a 3D rendition of the Be logo that spins around mathematically at 120 frames per second. It was designed to push the CPU to the limit, back when a dual 66MHz 603 BeBox was one of the flagship BeBox machines.

Calah

Calah is a strategy game that you’re playing against a computer opponent. You’ll have to collect more seeds than the opponent for you to win. You can learn more about this game here.

Container

Container gives you a small shelf that allows you to place the replicants (NetPositive and Clock) there. You can turn on “Show Replicants” from the Be menu, then navigate to any app that supports replicants, then drag and drop the little hand that appears.

Dominoes

This demo app shows you cascading dominoes. You can control it using the numeric keypad on your keyboard. Press ALT + Q to exit.

Flight

A simple flying and shooting game. You can control your flight direction using the numeric keypad on your keyboard, shoot using the right SHIFT key, and increase or decrease your flight speed by pressing LEFT and RIGHT arrow keys.

FontDemo

This demo shows you versatility and speed of BeOS when it comes to the usage of fonts. It is operated on a WYSIWYG basis, which means that if you set a font or its properties, the preview window will immediately get updated.

GLTeapot

This demo shows you a 3D teapot that rotates around. It demonstrates the usage of OpenGL in BeOS.

Kaleidoscope

This app draws colored lines as fast as it can to form a Kaleidoscope pattern.

Life

This demo app shows you Conway’s Game of Life, taking multithreading into account.

Mandelbrot

This demo is an application that demonstrates how multithreading works under BeOS, which uses symmetrical multiprocessing. It draws images based on the Mandelbrot set.

Minesweeper

This is the game of logic and deduction. It gives you a grid of squares that represent a mine-infested sea. You’ll attempt to locate all the mines on a grid without blowing any of them up.

Bonus: Software Valet

Software Valet is an app marketplace that allows you to download and install BeOS applications straight from the internet. It also allows you to check for updates for your installed applications, update them, and manage them.

Since it depends on an active internet connection, it will have to communicate with the BeDepot servers, which are no longer available.

#BeOS #BeOS3 #BeOS30 #news #Tech #Technology #update
BeOS 3.0 on 86Box with Socket 8 [1995]

BeOS 3.0 was a version of BeOS that was first made available for traditional Intel computers, alongside the PowerPC architecture. It was available for purchase at $69.95 then raised to $99.95.

Our focus in this article is testing BeOS 3.0 on an 86Box emulated machine with a Socket 8 [1995] motherboard. You can download it from here. However, you’ll have to create separate ISO files for the two tracks that were found in the BIN/CUE format:

  • The first track is for the partitioning tool for Windows 95
  • The second track is for the BeOS installation

You can use bchunk beos-3.0.bin beos-3.0.cue beos-3.0.iso to get the two ISO files for the above tracks. Please note that you’ll also need to install Windows 95 in order to be able to install BeOS 3.0.

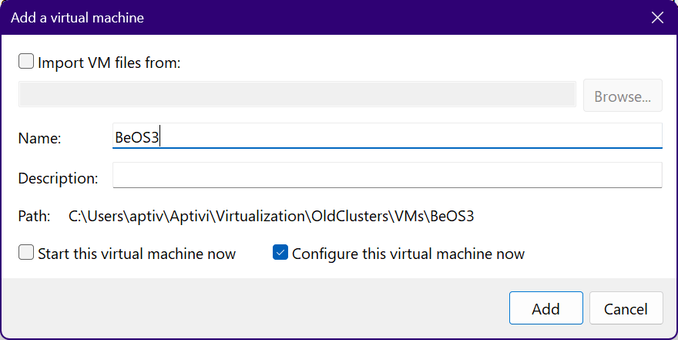
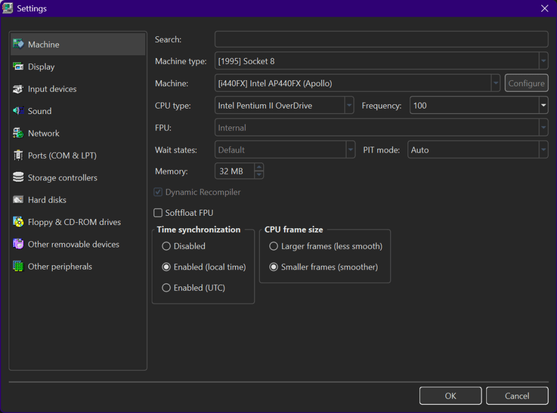
We’ve configured the virtual machine as follows:

We’ve configured a virtual machine to run with:

  • Machine type: [1995] Socket 8
  • Machine: [i440FX] Intel AP440FX (Apollo)
  • CPU: Intel Pentium II Overdrive @ 100 MHz
  • Memory: 32 MB
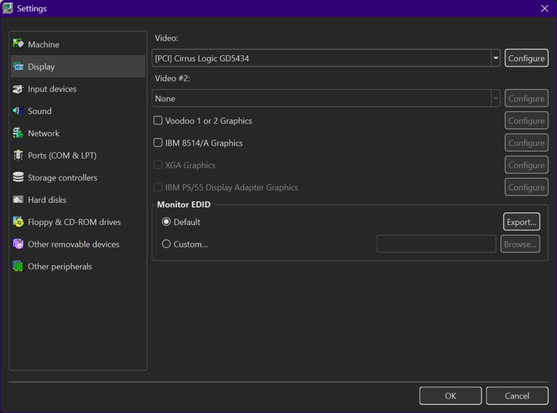
  • Video: [ISA16] Cirrus Logic GD5434
  • Keyboard: AT Keyboard
  • Mouse: PS/2 Mouse
  • Sound card: [ISA16] Sound Blaster 16 PnP
  • Floppy disk controller: Internal device
  • Hard disk controller 1: Internal device
  • New hard disk: os2warp452.vhd
    • C/H/S: 2080/16/63
    • Size: 1024 MB
    • Bus: IDE
    • Channel: 0:0
  • CD-ROM drive 1: ATAPI (0:1) HITACHI CDR-8130 0020 (16x)

Once everything is configured as above, we can now start the virtual machine. Before installing Windows 95 prior to BeOS 3.0, we need to change the following BIOS settings to ensure that BeOS can start successfully:

Now, let’s assume that Windows 95 has been successfully installed to the virtual machine. Insert the first disc called beos-3.0.iso01.iso to the CD-ROM reader, then let Windows start.

Open My Computer, then double-click on the BeOS logo to start the installation wizard for the PartitionMagic Special Edition partitioner.

Now, follow the steps to install this software.

As soon as you click Finish, Windows exits and the partitioner starts in a completely separate environment.

Since we need half the size of the Windows partition, we just need to click OK, then confirm the changes. Afterwards, the resize operation starts.

After the resize completes, you’ll be prompted to restart the virtual machine. Let it restart to Windows.

Once Windows starts, go to My Computer, then right-click on the CD-ROM drive (the BeOS icon), then navigate to experimental > Win95, and copy the BeLaunch folder to the root of the C: drive where Windows is installed.

After that, insert the second ISO file for the BeOS installer, just like below. Then, open the BeLaunch folder, and double-click on “BeOS Launcher”.

Wait for BeOS to start up…

You should be taken to a license agreement screen where you have to click Accept to continue the installation.

After that, make sure that the installer has automatically selected the newly-created BeOS partition created by PartitionMagic Special Edition. You can verify that by checking the partition ID, as well as the file system type. It should say “unknown”.

Press Begin, then let BeOS initialize the partition, just like below:

After initialization, the installation starts.

The installation should be successful at this point. Press Quit below.

Let the virtual machine reboot back to Windows. In case it hangs on the below screen (the tntats window), release the mouse control and press the reset icon.

Once Windows restarts, double-click on the BeOS Launcher icon. Afterwards, BeOS should automatically recognize the installed system. You should see the desktop below:

The installation is successful at this point! Here’s a demo screenshot of BeOS 3.0 installed alongside Windows 95.

Of course, when you try to shut down BeOS, you should see this window, since we have disabled APM:

#86Box #BeOS #BeOS3 #BeOS30 #news #Retrocomputing #Tech #Technology #update