Red Hat 5.0.5 “Hurricane” on 86Box with Super Socket 7 [1998]
Red Hat 5.0 “Hurricane”, not the newer Red Hat Enterprise 5, was released on December 1997 to introduce you with updated packages (at the time) and improvements over Red Hat 4.2 “Biltmore”. It includes the RealPlayer Real Audio Client/Server, which is proprietary software.
It also includes the Metro-X server, which is a commercial version of XFree86 that brings accelerated X11 server for hundreds of graphics cards and easy configuration over the original XFree86 server, thus giving you a fast, responsive user interface. The Red Hat installer will provide you with an option to use either Metro-X or the standard XFree86 server.
Our focus in this article is testing Red Hat 5.0 “Hurricane” with an original XFree86 server on an 86Box emulated machine with a Super Socket 7 [1998] motherboard. You can download it from here.
We’ve configured the virtual machine as follows:
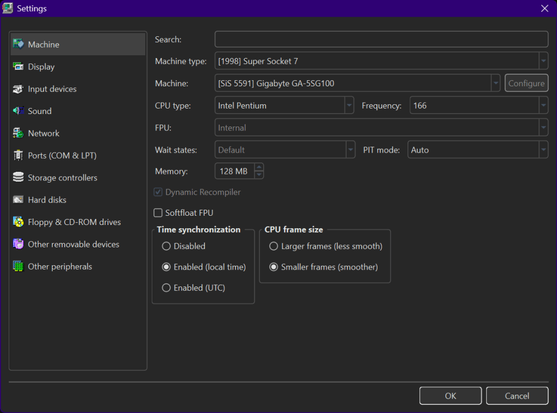
We’ve configured a virtual machine to run with:
- Machine type: [1998] Super Socket 7
- Machine: [SiS 5591] Gigabyte GA-5SG100
- CPU: Intel Pentium @ 166 MHz
- Memory: 128 MB
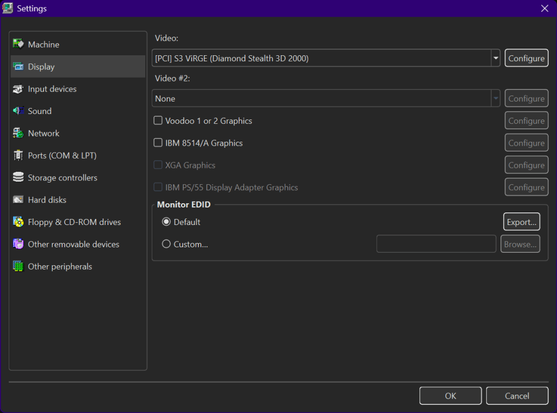
- Video: [PCI] S3 ViRGE (Diamond Stealth 3D 2000)
- Keyboard: AT Keyboard
- Mouse: PS/2 Mouse
- Sound card: [ISA16] Gravis Ultrasound
- Floppy disk controller: Internal device
- Hard disk controller 1: Internal device
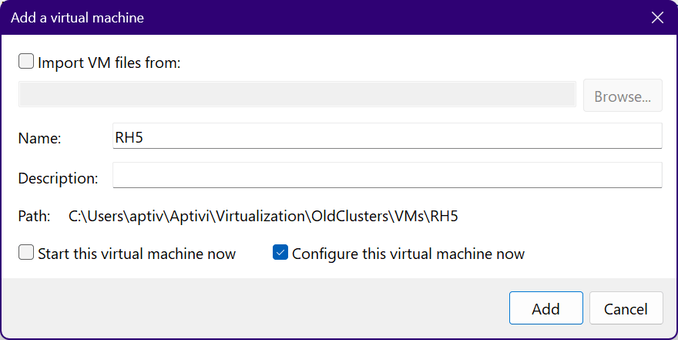
- New hard disk: RH5.vhd
- C/H/S: 2080/16/63
- Size: 1024 MB
- Bus: IDE
- Channel: 0:0
- CD-ROM drive 1: KENWOOD CD-ROM UCR-421 208E (72x)
Once everything is configured as above, we can now start the virtual machine. We’ll have to change the boot order to ensure that C comes first before CD-ROM.
Now, insert the disc called RedHatLinux-intel5.0.5.cue to the CD-ROM reader, then let Red Hat 5.0.5 start.
NOTE: If you can’t open the CUE file due to an error message saying that it couldn’t be opened, open the CUE file on your text editor and change the file name to match the bin file like this:
FILE "RedHatLinux-intel5.0.5.bin" BINARY TRACK 01 MODE1/2352 INDEX 01 00:00:00 After that, you should see the below screen:
Press ENTER, and let it boot to the installer.
First, select a keyboard type that matches your keyboard layout.
Now, choose the installation method. Since our only installation medium is a CD-ROM, keep “Local CDROM” selected, then press ENTER.
Press ENTER, since it’s going to be a new installation.
Now, we get asked if we need to set up SCSI. Since we haven’t added an SCSI drive, and used IDE for the virtual hard drive and ATAPI for the CD-ROM reader, we answer No.
Now, we get into the partitioning stage. Since we get asked if we need to use Disk Druid or fdisk, we’ve decided to use the former option as it’s easy to use and is in the TUI format for clear visualization of the partition table.
This message is normal for new drives that haven’t been initialized yet. Initialize it.
Now, we are in the partition table editor!
Now, let’s add 3 partitions:
- The first partition is going to be a
bootpartition that has a size of 500 MB, with Linux as the type and/as the mountpoint. - The second partition is going to be a
homepartition that has a size of 450 MB, with Linux as the type and/homeas the mountpoint. - The last partition is going to be a
swappartition that has a size of 72 MB, with Linux Swap as the type.
As Disk Druid doesn’t support boot partitions more than 500 MB, we’ve decided to partition the whole disk like that.
After that, the partition table should look like this:
Activate the swap space, then format the two partitions that you’ve just created.
Then, select the package groups to install. We have deselected several package groups to preserve some space.
Finally, confirm the installation.
…and the installation starts.
After the selected packages get installed, the next step is configuring the X server, with the mouse being automatically detected under /dev/psaux, which corresponds to the PS/2 mouse we’ve configured in the virtual machine.
Then, it asks us whether we need to emulate 3 buttons for the mouse (that is, pressing LEFT and RIGHT mouse buttons means that MIDDLE button is pressed).
After that, we get asked if we need to install Metro-X. We’ve answered No to this question.
After that, the X11 configuration program detected the S3 ViRGE video card via PCI probing.
Then, we need to configure the monitor for the X11 server. We’ve selected “Generic Multisync” to enable higher resolutions.
Then, the X11 server resolution probing step begins so that tests will be made to choose the most optimal resolution.
As you can see, the optimal configuration for the selected monitor type and the video card is 1024×768 and 16-bits per pixel color. The network configuration then comes next.
As we haven’t installed a network interface card, we’ve decided to answer No to this question. After that, remaining configuration is done, such as timezones and printers.
After that, we get asked to set a root password.
After that, the LILO bootloader installation step comes next, asking us where to install the bootloader: the master boot record of the primary hard disk, or the first sector of the first partition, boot.
We’ve decided to install the bootloader to the master boot record. Afterwards, we’re asked to provide a set of kernel options to the bootloader.
Since we don’t have a system that requires configuring the kernel parameters for everything to work properly, we’ve left it blank.
Finally, the congratulatory message showing that the installation has finished appeared.
After that, let Red Hat Linux 5.0 start up from the hard disk.
Great! Now, let’s start the X server using startx.
Awesome! The X11 server started up without a hitch and in a full resolution of 1024×768 with 16-bit colors! The configuration was successful at this point!
Here are some of the demonstration pictures of the Red Hat 5.0 GUI with FVWM95 as the window manager:
#86Box #news #redHat #RedHat5 #RedHat5Hurricane #RedHat50 #RedHat50Hurricane #Retrocomputing #Tech #Technology #update