Successful Test of the CHA LEFS Feather EFHW + QMX
#QRP #CW #CWMorse #EFHW #WWFF #POTA
https://youtu.be/T_aSTs1g9_o?si=5yt2apQfuPxWpMJA
#QRP #CW #CWMorse #EFHW #WWFF #POTA
https://youtu.be/T_aSTs1g9_o?si=5yt2apQfuPxWpMJA
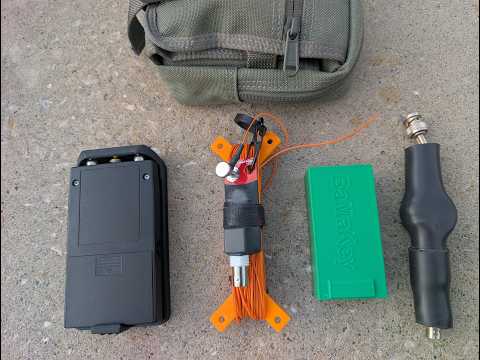
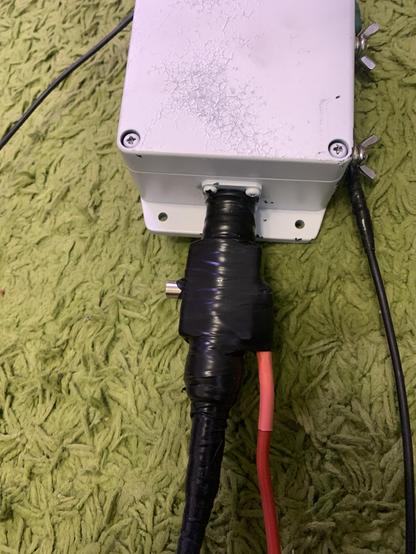
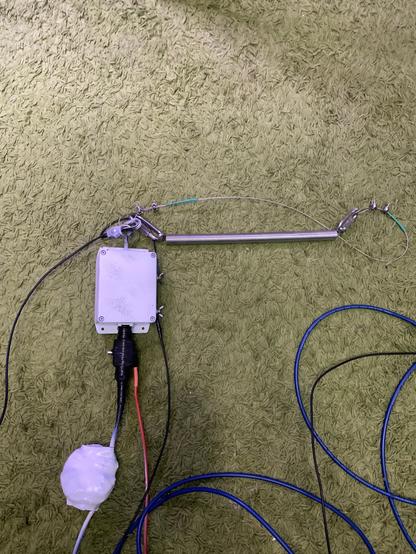
What goes up tomorrow on the EFHW feedpoint assembly:
— WRLW 1:49 transformer, weatherproof enclosure, silica gel inside
— Diamond CA-35RS lightning arrestor
— CMC choke, 12 turns, 2×FT240-43, RG-8X
— Spring shock absorber
— Dyneema support line
Wind, UV, rain, hail, static — it needs to handle all of it. No maintenance access at 60m AGL.

Been really enjoying the EFHW antenna for sure! I'm coloring the markers by band now, 'cause that seems way more interesting. I'm especially happy to get Nova Scotia this weekend!
Red=80m Green=40m Blue=20m Purple=17m
#hamRadio #amateurRadio #POTA #parksOnTheAir #ssb #efhw #17m #20m #40m #80m

Holy cow this weekend was insane on HF. I ended up with 142 SSB POTA contacts, on all bands from 40 meters to 10 meters. It was so much fun! The colors are listed in the image's ALT text. I think I need a vacation after all that!
#HF #POTA #hamRadio #amateurRadio #10m #12m #15m #17m #20m #40m #insanity #EFHW
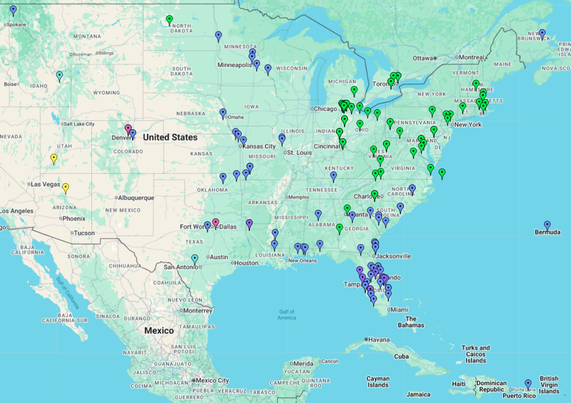
Spending this weekend working the new EFHW antenna, I got 96 POTA contacts across 10, 12, 17, 20 and 40 meters! All SSB, no digital! I am beyond happy with how it performs, and it even managed to get my last 2 states needed for hunting all 50 states in POTA!
#hamRadio #amateurRadio #SSB #POTA #EFHW #10m #12m #17m #20m #40m
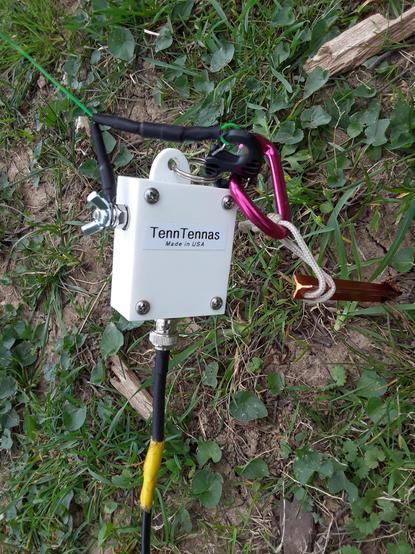
Well, it was such a nice day yesterday that I decided to put up the new EFHW antenna! Took a couple hours to get it in place and get it tuned up. It definitely works much better than I was expecting!
Managed to get the tune so I don't need to use any tuner at all on all bands that it supports! Everything is under 2:1 SWR and some are even nearly 1:1 which I really didn't expect!
The markers are color coded for the bands that I got contacts on. Green ones for 40 meters, orange ones for 30 meters, blue for 20 meters, cyan for 15 meters, and yellow for 10 meters!
I can definitely recommend this antenna ( myantennas.com EFHW ) without question.
#hamRadio #amateurRadio #POTA #EFHW #10m #15m #20m #30m #40m
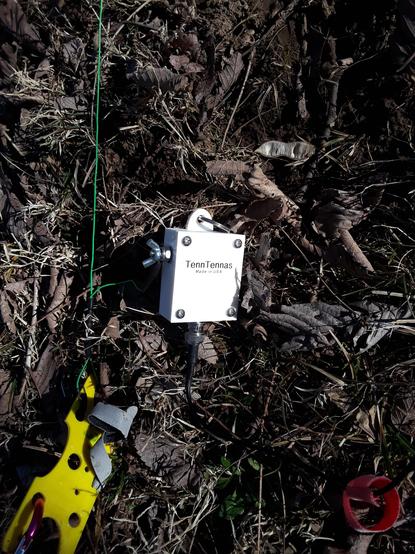
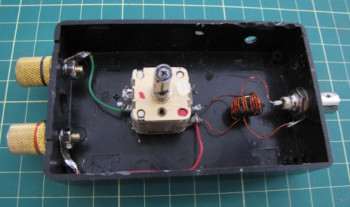
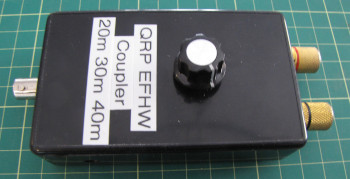
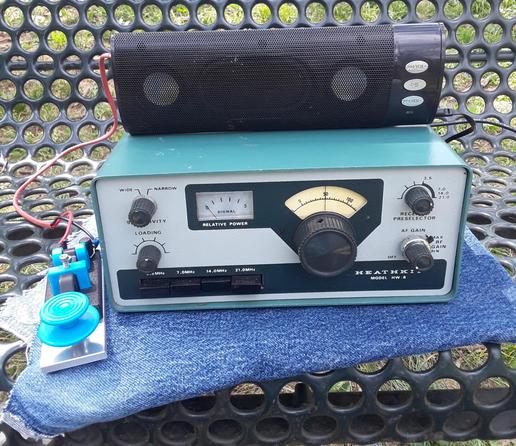
Engineering challenges of the completed QRP EFHW coupler
Kudos to Kits and Parts, the United States Postal Service and the Canada Post dog sled teams who fearlessly fought their way through blizzards on the frozen barren tundra into the wild white yonder to safely deliver my package of toroid cores. But, as soon as I had unpacked the goodies I realized I may have fired off the order with excessive haste. I ordered some medium sized Type 2 and Type 6 powdered iron toroids for my occasional QROp (20 watts) projects and some smaller ones for QRP. How small? Too small! In my haste I had ordered 25 T37-2 and 25 T37-6 cores. These cores are so small that winding inductors on them requires a great deal and patience and dexterity – I have neither.
When life hands you lemons …
When life hands me self-inflicted lemons I tend to fill my head with expletives that are best not spoken in polite company. Then I find ways to cover up my mistakes. T37 cores are really only suitable in the stages of a transceiver prior to the final PA. Could they possibly be persuaded to handle the full 4.5 watts output of my revered antique Yaesu FT-817?
I reminded myself that this is Ham Radio Outside the Box and in that spirit I would find a way to use those lilliputian cores in my project. There were two screaming demons haunting my thoughts on this. A toroidal core can overheat due to being too small to handle the power applied to it. Or it can simply reach magnetic saturation causing it to fail to perform as expected.
I remembered an old trick used by hams who enjoy pumping out so much power they risk blowing holes in the ionosphere. They use multiple stacked toroid cores to share the load. Would that work with the tiny cores I had at my disposal? I decided to take the risk, but first test the idea on the bench before venturing out into the Big Blue Sky Shack.
But how to test the idea?
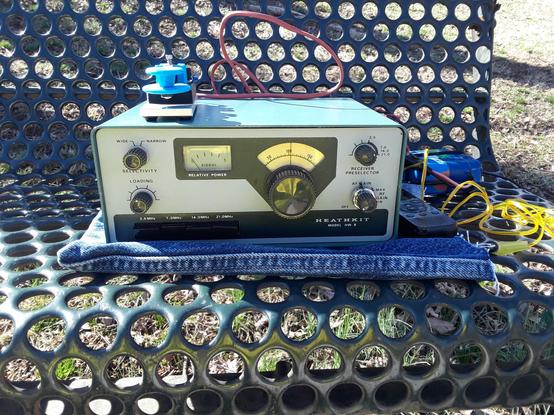
If a core can’t handle the power applied to it it will get hot. If the core reaches magnetic saturation it will no longer function as expected. I figured a simple way to test for these conditions on the bench would be a keydown test into a 2.5Kohm dummy load. I used two stacked T37-6 cores, held together with electrical tape and then by the wire wound through them. The setup was almost identical to the “20 minute” version published in the previous post, except that the inductor was now the toroidal core version.
The tuned circuit, dummy load and transceiver were hooked up on the bench and then, with very little trepidation (if I blew up the inductor I had more wire, more cores), I keyed up the full four and a half watts from the transceiver for 30 seconds while monitoring the SWR on my Norcal QRP power meter. Did it survive the test?
The Norcal QRP power meter indicated a rock steady SWR throughout the test. The cores may have increased in temperature but not enough to be detectable when touched with my fingers at the end of the keydown. Not a scientifically rigorous test but it inspired confidence in the viability of the solution. Stacking two cores increases the depth through which the wires pass through the core and that may compensate for the smaller diameter.
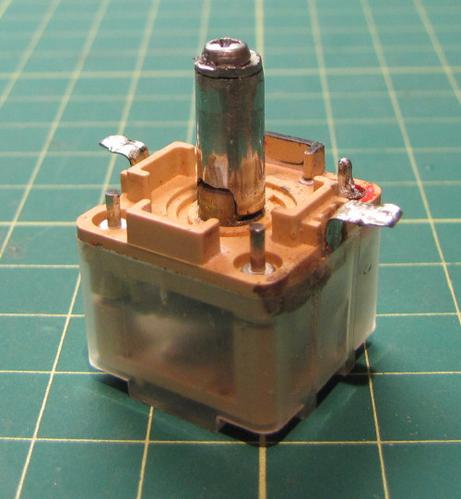
And now – that pesky polyvaricon
The 3D printing revolution hasn’t yet penetrated the basement laboratories of Ham Radio Outside the Box. Instead I am limited to good old-fashioned engineering techniques in my build projects. It is amazing what can be achieved with an extensive collection of materials and a few simple tools. That is exactly how I approached the challenge of attaching a regular quarter-inch knob to the stubby, irregular shaft of a polyvaricon.
The basic idea has already been covered on this blog but it has now been refined into a reproducible technique that is rugged and reliable enough to survive the rigors of being bumped over the steep and rocky terrain encountered along the north end of the Niagara Escarpment. The solution to the challenge is to construct a short quarter-inch diameter adapter shaft than can be securely attached to the polyvaricon. The basic material used is a steel drinking straw. Now that plastic straws have been declared a deadly hazard to the survival of the human race, steel straws are becoming quite easy to find.
Two tools were required; a Dremel for cutting a slot in one end of a section of the straw, and a small tube cutter for cutting the adapter shaft to the correct length. The adapter shaft is secured to the polyvaricon by means of a long, fine bolt and a small washer. Scavenging polyvaricons from dirt cheap thrift store AM/FM radios ensures the correct size of bolt is obtained. I did have to grind down the washer a little when the adapter shaft was fitted to ensure it slid into the knob nicely. Building the adapter shaft took about a half hour of delicate work while wearing a magnifying lens to enhance my degenerating vision. I imagine making something similar with a 3D printer would take as long.
I have another project developing on the workbench which involves the same inductor core tricks and polyvaricon mods as outlined here. It is a wideband L-match and if it works I’ll publish the details here in a couple of weeks. On the other hand, if it doesn’t work …
Help support HamRadioOutsidetheBox
No “tip-jar”, “buy me a coffee”, Patreon, or Amazon links here. I enjoy my hobby and I enjoy writing about it. If you would like to support this blog please follow/subscribe using the link at the bottom of my home page, or like, comment (links at the bottom of each post), repost or share links to my posts on social media. If you would like to email me directly you will find my email address on my QRZ.com page. Thank you!
The following copyright notice applies to all content on this blog.
This work is licensed under a Creative Commons Attribution-NonCommercial-NoDerivatives 4.0 International License.